Where's Wendy

A photo journal of LTC's (Letterboxing Trading Cards) created by Where's Wendy. All LTC's showcase at least one of Where's Wendy's hand-carved stamps.

Sunday, December 19, 2010

Transfer Methods - SUMMARY

The following are the results of experimenting with different transfer methods (ways of getting an image onto the carving material).


This is a "summary" photo of all the methods I tried: 
From left to right....
Iron / Heat Transfer
Acetone
Pencil Transfer
Wintergreen Oil


The transfer from the Wintergreen Oil is by far the darkest and most clear.  I took the other "experiment" images (not including the pencil transfer) and used Wintergreen Oil to try to transfer the image darker.


This is a photo of the results.


So......in conclusion, I am 'sold' on Wintergreen Oil as my preferred method of transfering images from a toner-based print-out to the carving material.




Transfer Methods - WINTERGREEN OIL

The following are the results of experimenting with different transfer methods (ways of getting an image onto the carving material).

WINTERGREEN OIL:
Using Wintergreen Oil for transfers was suggested on the AtlasQuest letterboxing site. I finally managed to track down some Wintergreen Oil (at a nutrition store) and tried it. I LOVE IT!!!! This is my favourite of all the transfer methods.


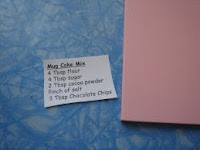
This is the image I wanted to transfer and carve. It MUST be printed on a toner-based printer or copier.


This is the Wintergreen Oil. It comes in a small container, and this package cost around $8.00.


A close-up of the bottle itself.


Place a small drop of the oil (it takes so little) on the surface of the carving material.


I used a Q-tip to spread the oil as evenly as possible over the surface of the carving material.


Place printed image face down on top of the wet surface.


I use the Q-tip (that I used for spreading the oil) to "press" the surface and ensure that all of the image is saturated with the oil.


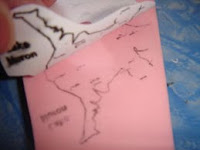
Gently peel back the paper to see the image on the carving material. If any spots were not transferred, lay the paper back down again and add a wee bit more oil (too much will cause the image to blotch).


This is the completed image transfer. Notice how dark and clear it comes out.


Saturday, December 18, 2010

Transfer Methods - ACETONE

The following are the results of experimenting with different transfer methods (ways of getting an image onto the carving material).

ACETONE:


This is the image that I want to transfer to the carving material. It MUST be printed using a toner-based printer or copier.


You can use nail polish remover with acetone, or purchase pure acetone at the hardware store (find it in the area with paint removers). It comes in a big can, so I decanted some into a smaller glass jar.


Lay the image face down on the surface of the carving material.


I use a Q-tip to apply the acetone to the back of the image. Apply just enough to make it wet, or the image may smear.


Start to peel back the paper image. If the transfer isn't dark enough, lay the paper back down and apply a bit more acetone. If it is good, peel paper off completely.


This is the completed transfer. It shows much more detail than the heat transfer method, and is much more precise (for lines or circles or details) than the pencil transfer method.

Transfer Methods - HEAT TRANSFER

The following are the results of experimenting with different transfer methods (ways of getting an image onto the carving material).

HEAT TRANSFER:


The image MUST be printed using a toner-based printer or copier.

I am using a craft/quilting iron, but you can use a full-size iron instead. Turn it on, and set it to a high heat.


Place the image, face down on the carving material.


Cover any "exposed" carving material with a blank piece of paper to make sure that the iron doesn't come into direct contact with the material.


Place iron on top of the paper and 'iron' the paper, being careful not to burn it. The paper should stick to the surface of the carving material.


Peel off protective paper, and then gently peel back the paper with the image. If it isn't dark enough, lay it back down again, and iron again.


This is the finished image. It is a bit darker than the photo portrays, but it is still difficult to see the detail.

Transfer Methods - PENCIL

The following are the results of experimenting with different transfer methods (ways of getting an image onto the carving material).

PENCIL METHOD:

The most direct (other than drawing directly onto the carving material) is the pencil method.


Start with an image drawn or traced in pencil.


Place it image-side down on the carving block.


...and rub it with your finger, the side of a pencil or any smooth edged tool.


Peel back the paper slowly. If the image is lighter in places, lay it back down and rub some more.


This is the resulting image from the Pencil Transfer method.